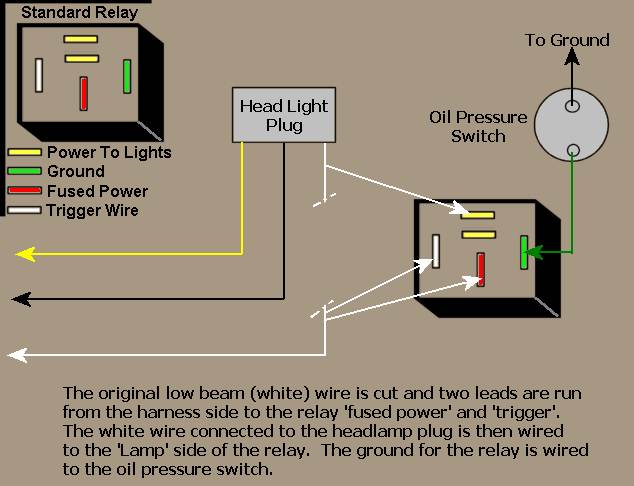
Remove the headlight from the headlight bucket and set it aside. I would recommend placing a towel or something over the front fender just in case you drop a tool so that you don't chip any paint. Using the driving light relay we want to break the original circuit of the low beam side of the headlight. This is the white wire going to the headlight plug. This diagram shows what we are going to do. Cut the white headlight wire leaving enough room to make some solder connections. Take two small pieces of wire about 4" long and solder a blade connection on one end of each wire. Then solder both of these wires to the white wire where it comes out of the wiring harness. Connect one of these two wires to the Power+ side of the relay, connect the other to the "Trigger" side of the relay. This will allow the headlight to be powered by the original wiring and retain the original wiring fuse protection. Solder a blade connector to the white wire coming off the headlamp plug. This wire needs to be connected to the "Lamp" or "Aux Power" of the relay. Finally take the wire coming from the oil pressure relay and solder a blade connector on that and connect it to the "Ground" plug of the relay. Tape and secure all the connections, and re-install the headlight and test. I would only do this to the low beam side of the headlight so that if the relay or the sending unit should fail while driving along at night I will still have high beam lights on the factory circuit. I also have made a small jumper, a 4" piece of wire with alligator clips on each end, which I now carry in my tool bag so that I can jump around the oil sending unit if something fails or if I need to work on lights. | Page 1 | | Page 2 | Page 3 | |