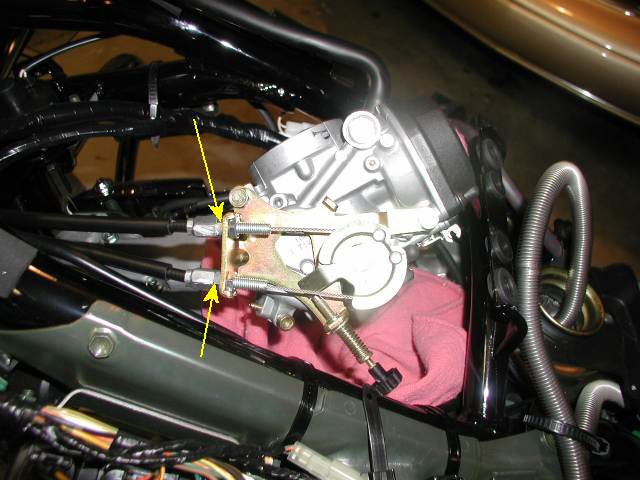
Jetting The LC - Page 2 Once you have the electrical plug removed you should be ready to remove the console and place it in an appropriate chrome safe storage position. I would recommend going ahead and closing the fuel door and latching it. With the center console removed you should now be ready to remove the tank half covers. Each one tank side is being held in place by the one remaining allen screw [image]. Remove one allen while holding the corresponding tank half to prevent it from falling to the floor and scratching up your paint. Once removed set each tank half in an appropriate place. With the console and both tank sides removed look under the air box towards the rear and you should see two clamps that hold the air box to the carbs [image]. Loosen both clamps until they turn freely. A handy tip here is use a second screwdriver to hold the clamp to keep it from turning while you loosen (and later tighten) these clamps. Raise the rear of the air box off the carbs and then raise it enough you can disconect any lines going to it. There is a crankcase ventilation line attached to the front [image] and if you still have the PAIR valve hooked up there is a line underneath that you will also need to disconnect. Mine has been removed, can't provided a picture. Click on this [image] to get familiar with the next parts that we will remove are and where they are located. These parts consist of the fuel line, TPS sensor connector, choke cable and throttle cable. Remove the fuel line and place it out of the way. Next remove the TPS connector. This connector has a retaining clip that is towards the outside of the carb, you need to squeeze it to get it unplugged. As with most any electrical connection pull the plug, not the wires [image] Unhook the choke cable. This is a bit tricky. The cable assembly is located at the back of the carbs, there is a metal tube that the cable is in, and this tube is in a notch in the carb body. You can manipulate this towards the outside of the bike to get it out of that notch and give you some slack. Then using a finger work the cable to the 6 o'clock position where this is a notch that lets the cable come out of the bracket [image]. It is a bit tricky and patience is a virture here sometimes. Next look under the carbs and find the clamps that hold the carbs onto the intake manifolds. Each carb has one clamp holding it down as seen in this [image]. Loosen both clamps sufficiently to allow the carbs to come out of the intake manifolds. Once you have the carbs out of the manifolds immediately, like before you do anything else, take a clean rag, sock, whatever and cover the holes in the intake manifolds. Do this before proceeding any further so as not to drop anything into the engine. Raise the carbs up and turn them slightly to one side and take a 10mm wrench and loosen the locking nut on the throttle cables as seen here. You may want to mark these as to top and bottom just for simplicity sake later when you put them back on. Something as simple as a Sharpie pen with a "T" for top works well. Once the throttle cables are off you are ready to remove the carbs. Take them to an appropriate place and gently turn them on the sides and let the fuel go into a suitable container. The carbs hold a lot of fuel that you don't necessarily want pouring on you or on the kitchen table if that is where your going to rejet. |
| Continue >>> |
![[image]](images/0042.jpg)
![[image]](images/0043.jpg)
![[image]](images/0044.jpg)
![[image]](images/0045.jpg)
![[image]](images/0046.jpg)
![[image]](images/0049.jpg)
![[image]](images/0047.jpg)