![]()
| Big Sky Biker Bag | |
| This Tip Provided By Big Sky Truder & Big Sky Chic | |
| MOTORCYCLE BACKREST/CARRIER | |
|
If
you want to save a few dollars and make a backrest/carrier for your
motorcycle like we did, there is an easier and cheaper way to make one
rather than purchase one. Please read all instructions thoroughly before
starting!! |
|
|
MATERIAL 2: 2 yard of heavy duty vinyl material 3: 2 yards of 1” nylon webbing 4: 6 (each) 1” metal “D” rings 5: 2 (each) plastic backpack style latches 6: 1 yard of 2” wide Velcro [sew on type] 7: 1 foot of 3” wide nylon webbing {for handle} 8: 5” long piece of 3/4” diameter CPVC HOT/COLD PVC pipe {for handle} 9: 2 spools heavy duty upholstery thread 10: 1 foot Heavy duty ½” wide elastic for pocket {optional} 11: Conchos for decoration on pockets {optional} |
|
|
To
determine what size pipe to use for you and your motorcycle, measure
from the backrest pad on your motorcycle to the back portion of the
drivers’ saddle. I recommend using a 10” pipe for most all
applications. If that is not large enough you can make an optional
backrest pad and attach it to the carrier via Velcro. Most foam stores
in your area will have blanks of foam that you can choose from to be
able to make this backrest pad. The backrest pad can be covered with the
same vinyl material used for the carrier cover. The first and most
difficult part of obtaining the materials for this backrest is the
actual piece of pipe. You can visit a few construction sites and ask
them for a scrap piece of 10” sewer pipe. They normally have a few
pieces they throw out when they run the underground pipe to a man hole
and need to cut the ends off. Another option is to visit an irrigation
supply store that sells large diameter pipe and they might make you a
deal on a shorter section of pipe. The length of the pipe should be no
wider than the width of your saddlebags, if you have them. The rest of
the materials can be obtained from most any fabric store for around
$40.00US. |
|
|
|
|
|
INSTRUCTIONS |
|
| The dimensions shown in this write-up are the ones we used to make the carrier shown in the attached pictures. THE DIMENSIONS WE USED FOR OUR COVER MAY NOT WORK FOR YOUR APPLICATION! Once you have the piece of pipe, place the pipe on your motorcycle and mark the following: | |
|
Top of the carrier on your motorcycle: Mark on the top of the piece of pipe all the way across the top of the pipe using a Sharpie ink pen. To ensure this mark is somewhat straight put one mark on the pipe, then take the pipe off the motorcycle and stand the pipe on its end. Use a carpenter’s level and hold the level against the mark on the pipe in a plumb configuration. Once plumb, mark a line along the length of the pipe to establish the top of the carrier. [Note all other measurements can be measured off of this line] |
|
|
Location of the Handle: Position the pipe orientated so the top of the pipe is up. I place the handle towards the back side of the carrier and make sure and leave plenty of room to be able to get a gloved hand into the handle, |
|
|
Locations of the “D”
rings: Position the pipe orientated so the top of the pipe is up. Mark the “D” ring locations on the pipe after locating the attachment points on your motorcycle and trying to figure out how to best use bungee cords to hold the carrier onto your motorcycle. More “D” rings can always be added for this purpose. When marking these you not only mark the locations on the pipe but keep in mind width wise where these need to be positioned so they will be as wide as or wider than the backrest on your motorcycle. This will determine the locations of the long reinforcing straps on the main cover. |
|
|
Location of Velcro for
Optional Backrest: Position the pipe orientated so the top of the pipe is up. Mark the position on the front side of the pipe to be able to mount the optional backrest pad. Sit on the motorcycle with the pipe behind you and the pipe oriented so the top of the pipe is up. Lean back against the pipe and have a friend mark the locations so you can determine the best positions to attach the Velcro to hold the optional backrest. A backrest may not be needed but if the 10” pipe provides a space between your back and the pipe, a backrest pad should be considered. |
|
|
|
|
| MAKING THE BACKREST/CARRIER | |
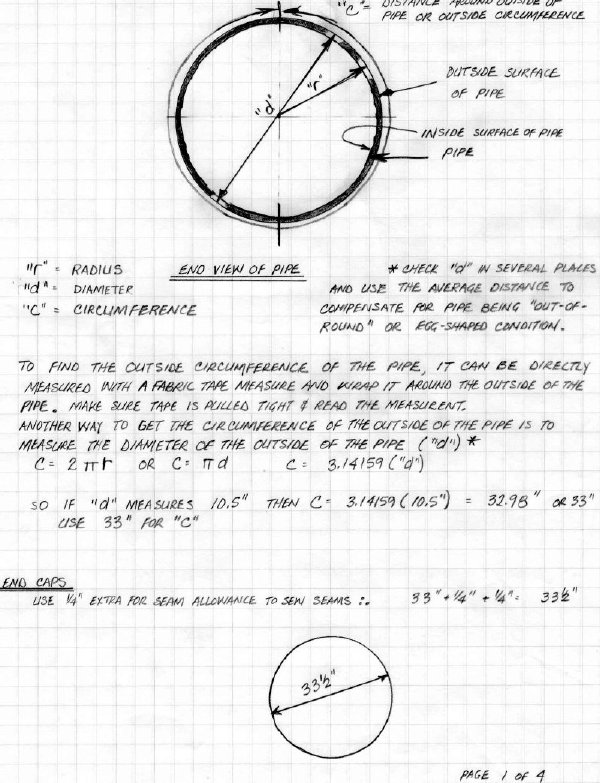
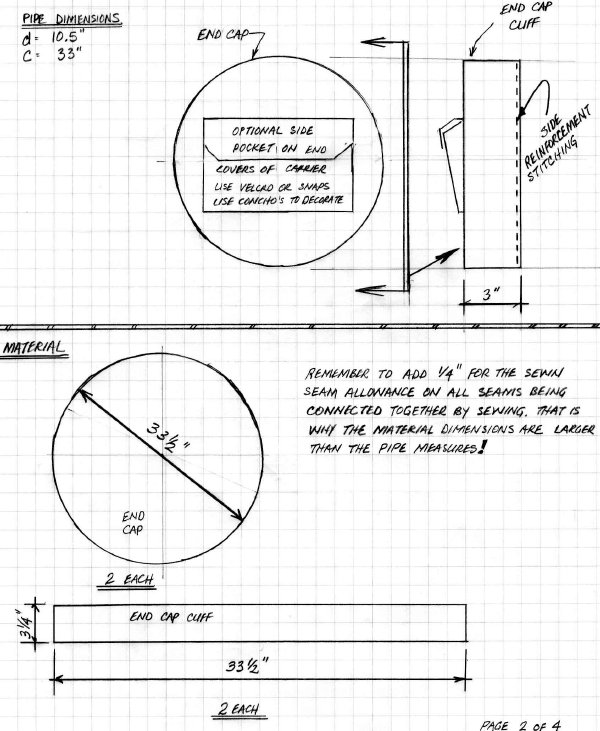
| The first step is to determine how large of pieces you need to be able to make your cover for your piece of pipe. Pages 1 through 4 should provide you with the necessary information to be able to determine the correct sizes of the vinyl pieces for the carrier cover. Make sure and not only measure the circumference of the pipe but also the diameter of the pipe and calculate the circumference for a double check. If you only use the diameter of the pipe to calculate the circumference, make several diameter measurements and use the average of those measurements because the pipe may not be completely “round” so to speak. | |
 Page 1 |
 Page 2 |
 Page 3 |
 Page 4 |
| The rest is rather easy to do but make sure you think it through so you can get the pieces to sew together and into your sewing machine. Check to make sure your sewing machine will sew heavy duty materials. A leather needle works best in the sewing machine. Note we recommend stitching an “X” type of reinforcement stitch on both sides of all attachments to provide more reinforcement for these attachment points. | |
|
|
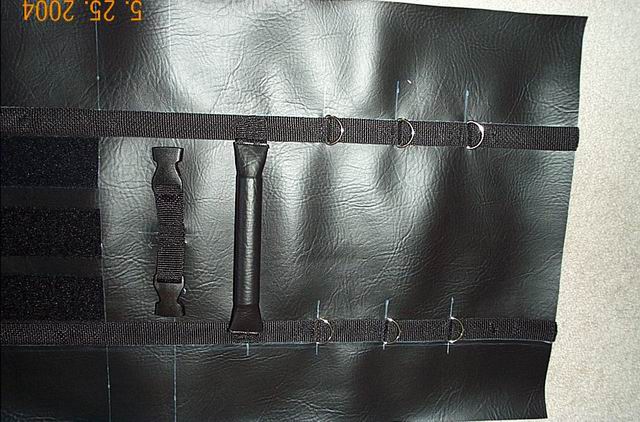
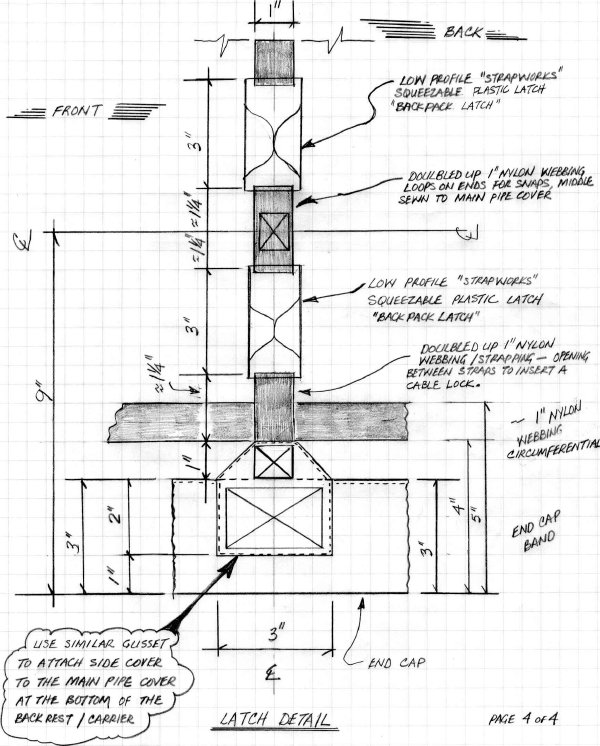
This picture shows the back half of the cover, including the latch, handle and the “D” rings sewn onto the carrier cover. The latch pieces use one-half of the plastic backpacker type of latch and the webbing material is doubled over so the loops in the webbing run through the end of the latches. Note the latch is sewn on the “TOP” or center of the carrier so the latch will ride on the top of the carrier when it is mounted on your motorcycle. The “D” rings are used for holding the carrier to the motorcycle and they can be positioned anywhere that will work to custom fit your scooter. You can use bungee cords to attach to these “D” rings and to your motorcycle. {This picture coincides with the “Back” or right hand portion of Page 3} |
|
|
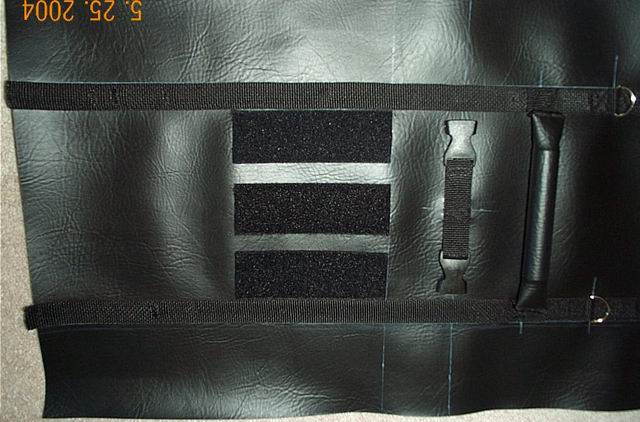
This picture shows the front half of the cover, including the wide Velcro pieces sewn to the cover to attach an optional backrest pad. |
|
|
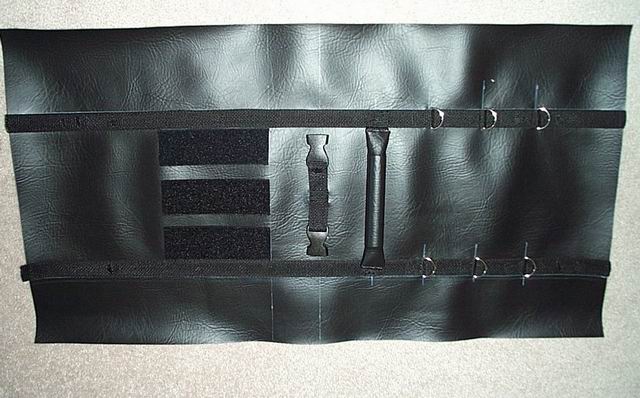
This picture shows the entire cover, ready to have the ends sewn together so it can be placed on around the outside of the piece of pipe. |
|
|
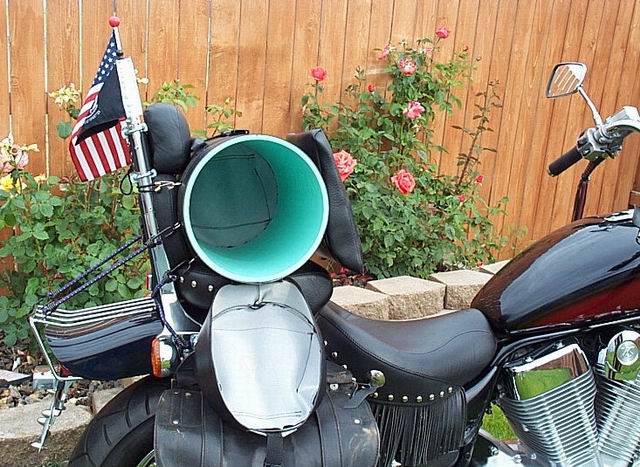
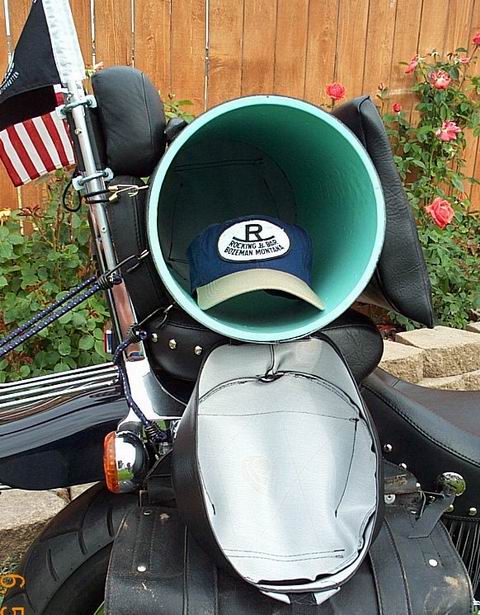
These pictures show what the backrest / carrier looks like on the bike with the end cover open. This will give you an idea of how much you can store inside of the carrier. |
|
|
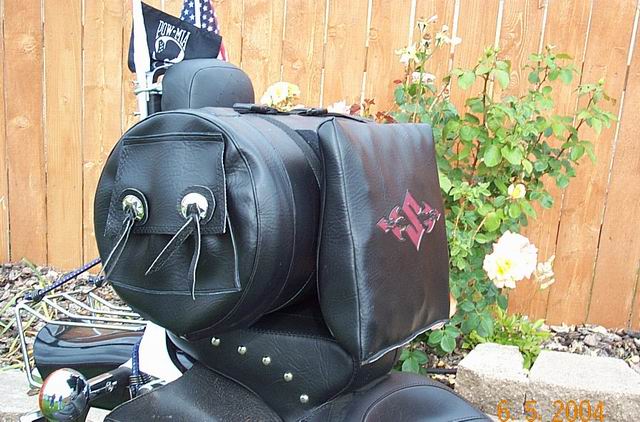
This picture shows what the backrest/carrier looks like with the end cover closed. The pockets were added on the sides of the end covers for holding maps and other smaller items. Note the backrest pad that is held on with the Velcro. |
|
|
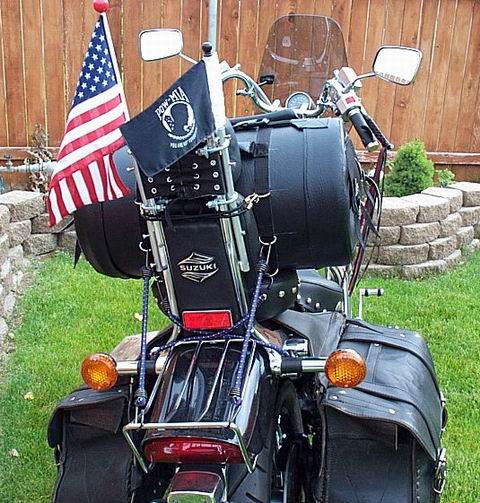
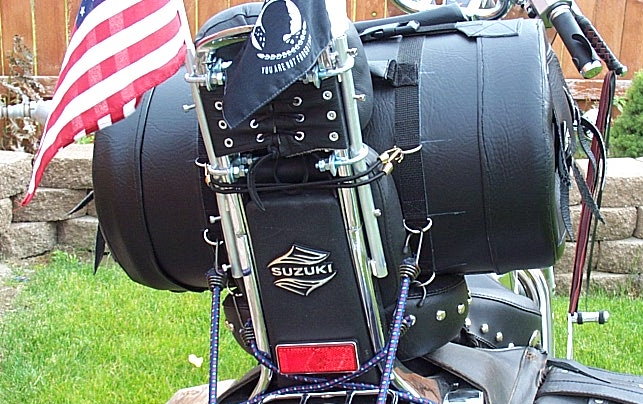
These pictures show what the backrest/carrier looks like from the rear when it is mounted to the motorcycle using bungee cords. |
|
|
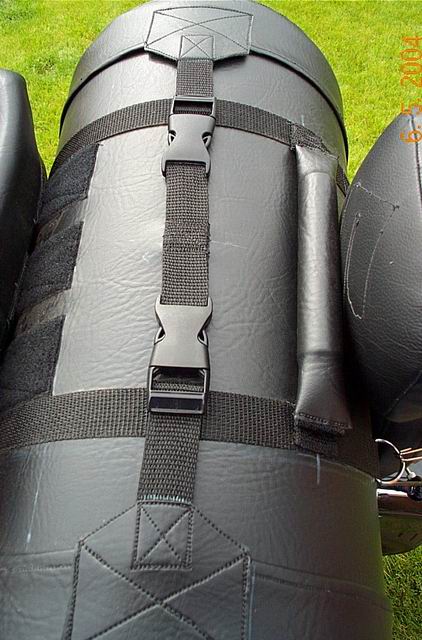
These are different views looking down at the top portion of the carrier to show you how the ends caps look, how the latches work and also how the handle looks when the carrier is completed. Note the “X” stitching pattern to provide a stronger connection between the layers of vinyl. Note that a cable lock could be installed between the double nylon strapping between the end cover attachment and the plastic latch to lock the end covers closed. |
|
|
|
|
If You Attempt
Modifications & Ruin Your Motorcycle |
|
|
I Am Not Responsible For Use/Misuse Of These Tips & Tricks |
|
|
|
|